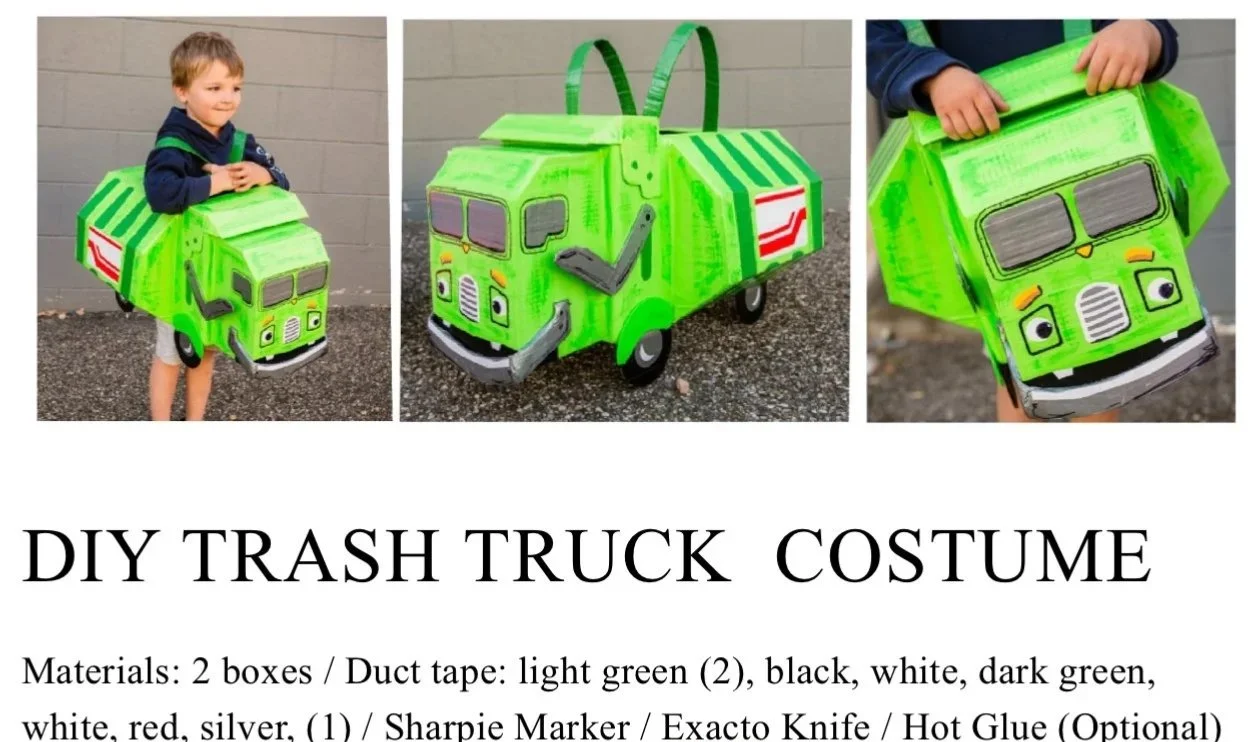
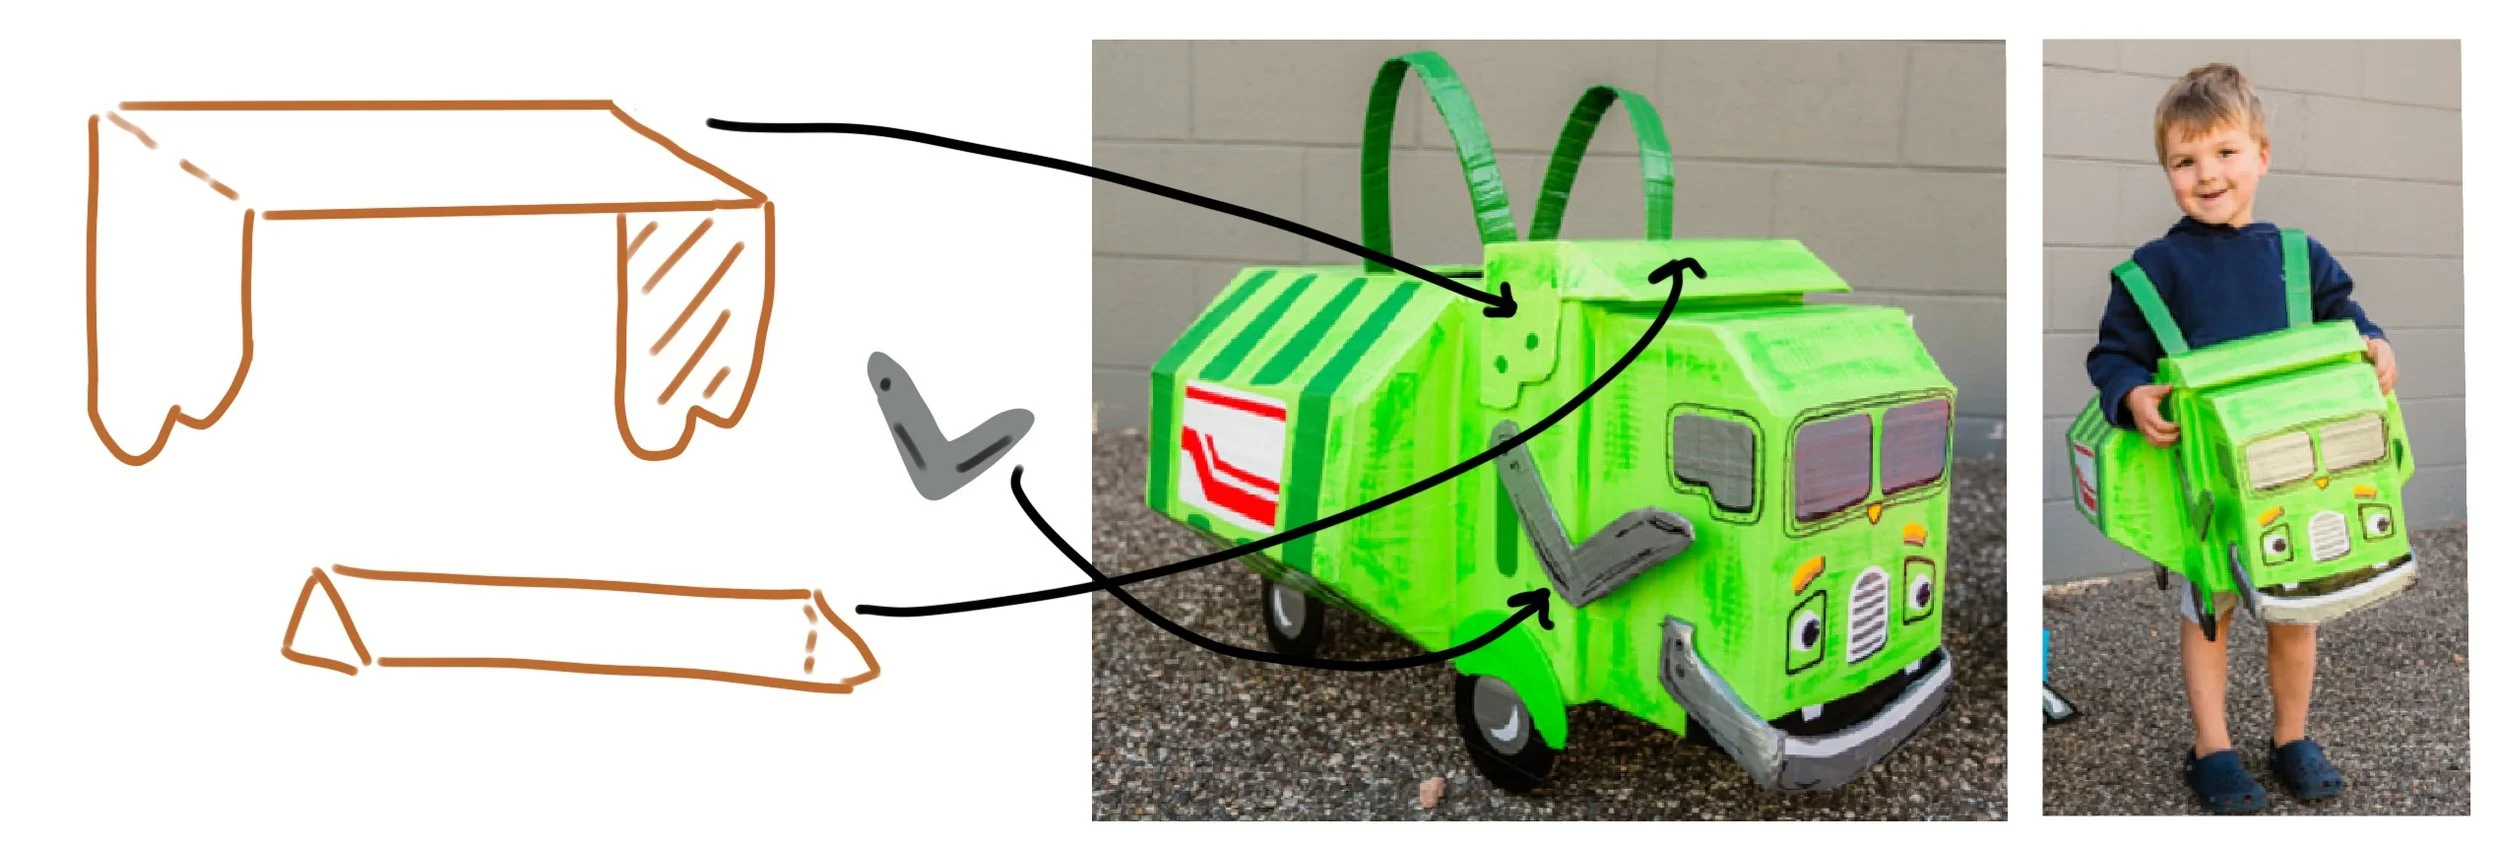
Find 2 boxes - with one being larger than the other. Smaller box tips upright in front. Larger box opens downward.
Cut diagonal piece out of the front to soft the edge of the face of the costume. Fill in with filler piece. Use brown, packing tape - if you’d like to paint it. Feels like paper. Otherwise, if you’re planning on covering with duct tape - use any tape.
Cut all but the top flaps off of front box. Cut the top flap into two prongs. Cut sluts into the larger box and slide them in. This will secure the two boxes together very well. If this step feels like too much - simply duct tape the two boxes together very well- and move on. It all works!!
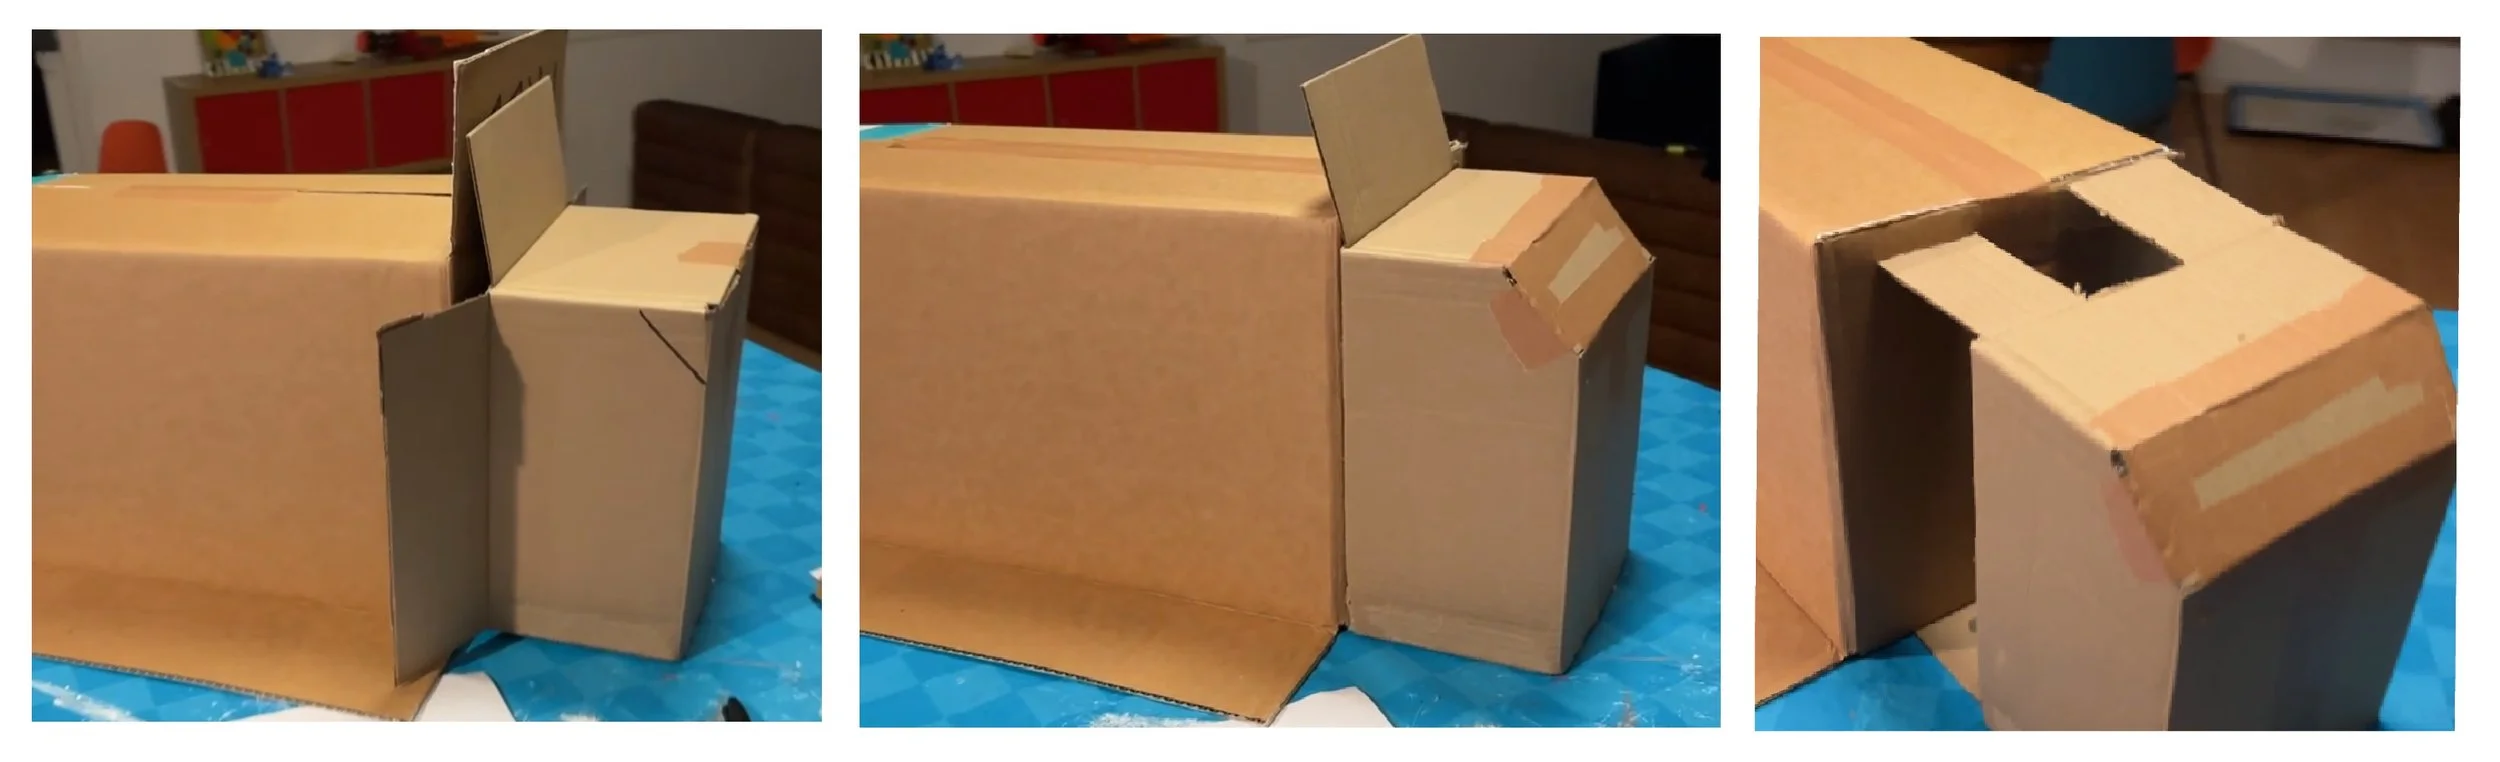
Trace a large roll of tape for the front and back wheels. Since the wheels overlay the seem - tape a small rectangle piece inside of wheels to hold them straight.
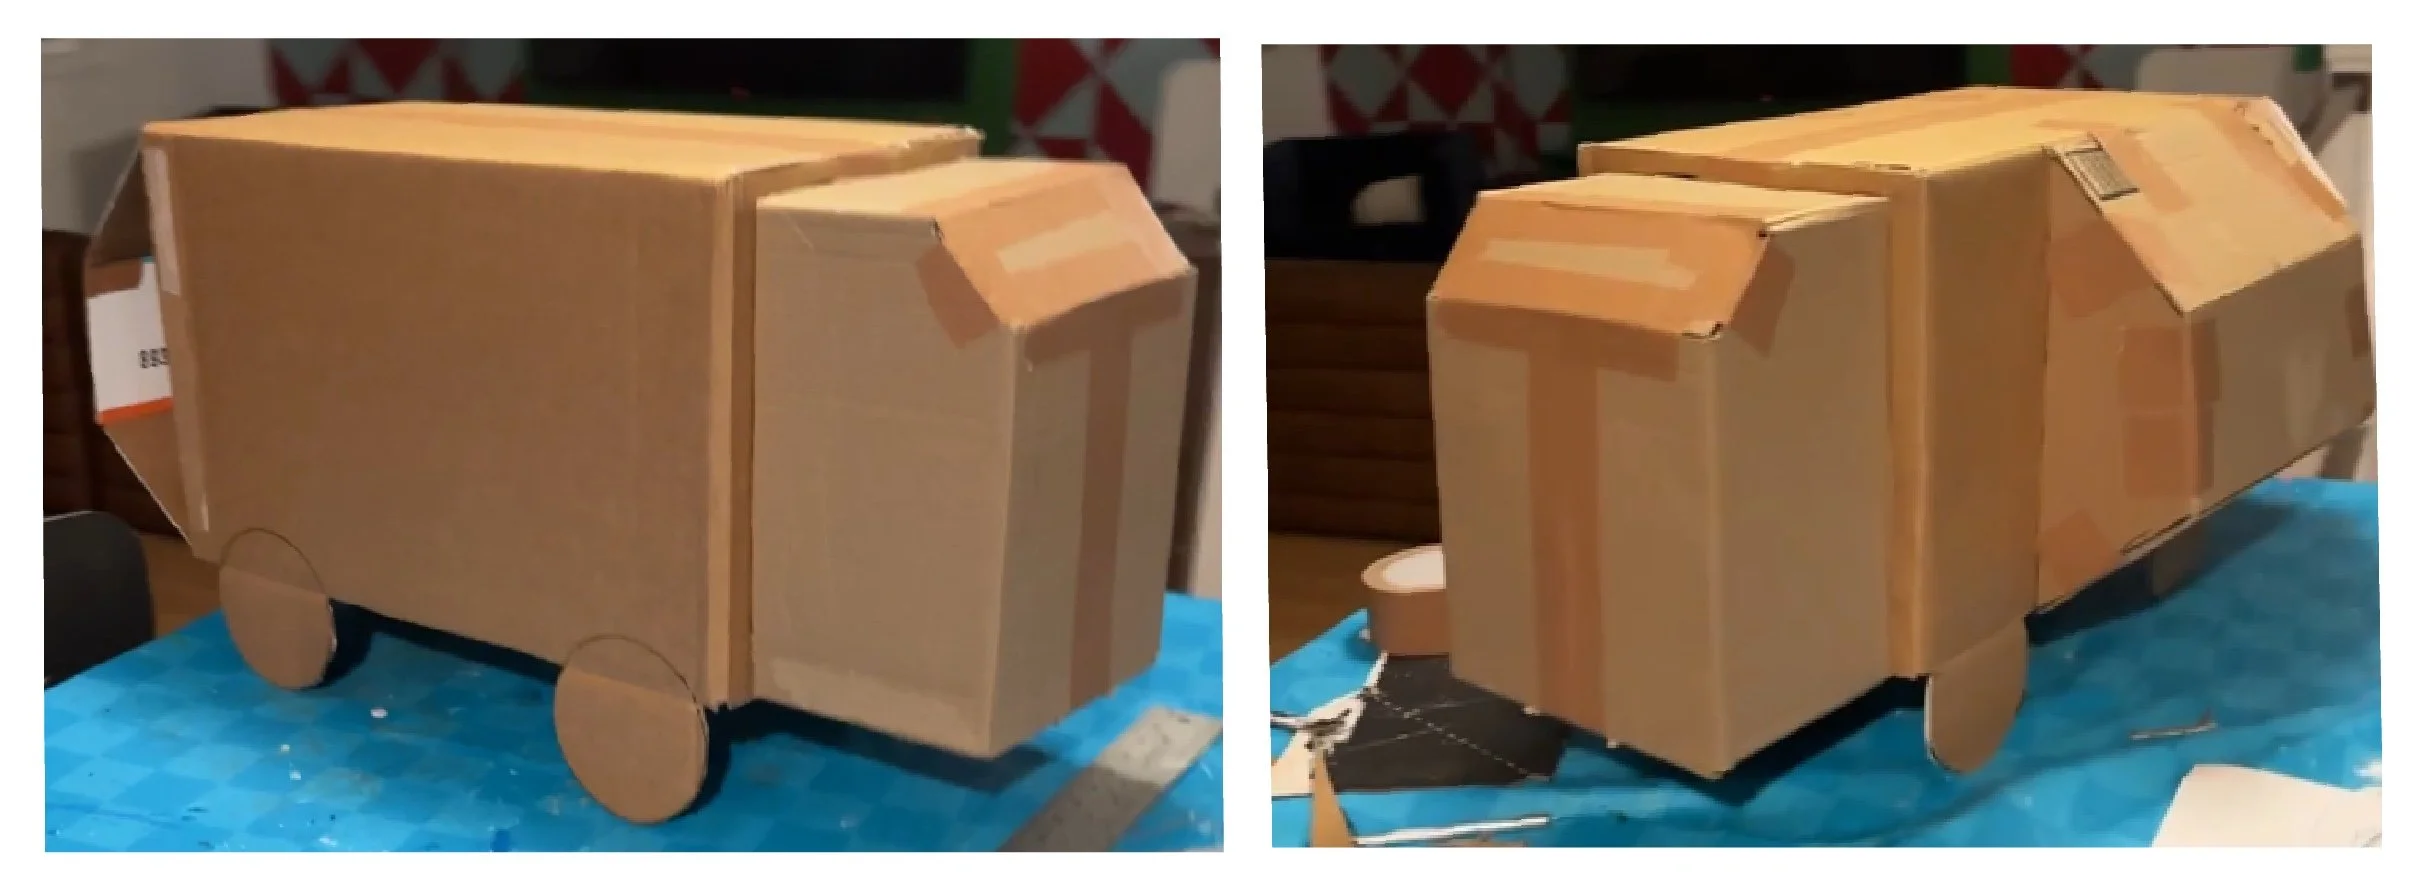
Also, pull back flaps out of larger box and add a rectangle from pieces you’ve cut off - to make dimension in back of truck.
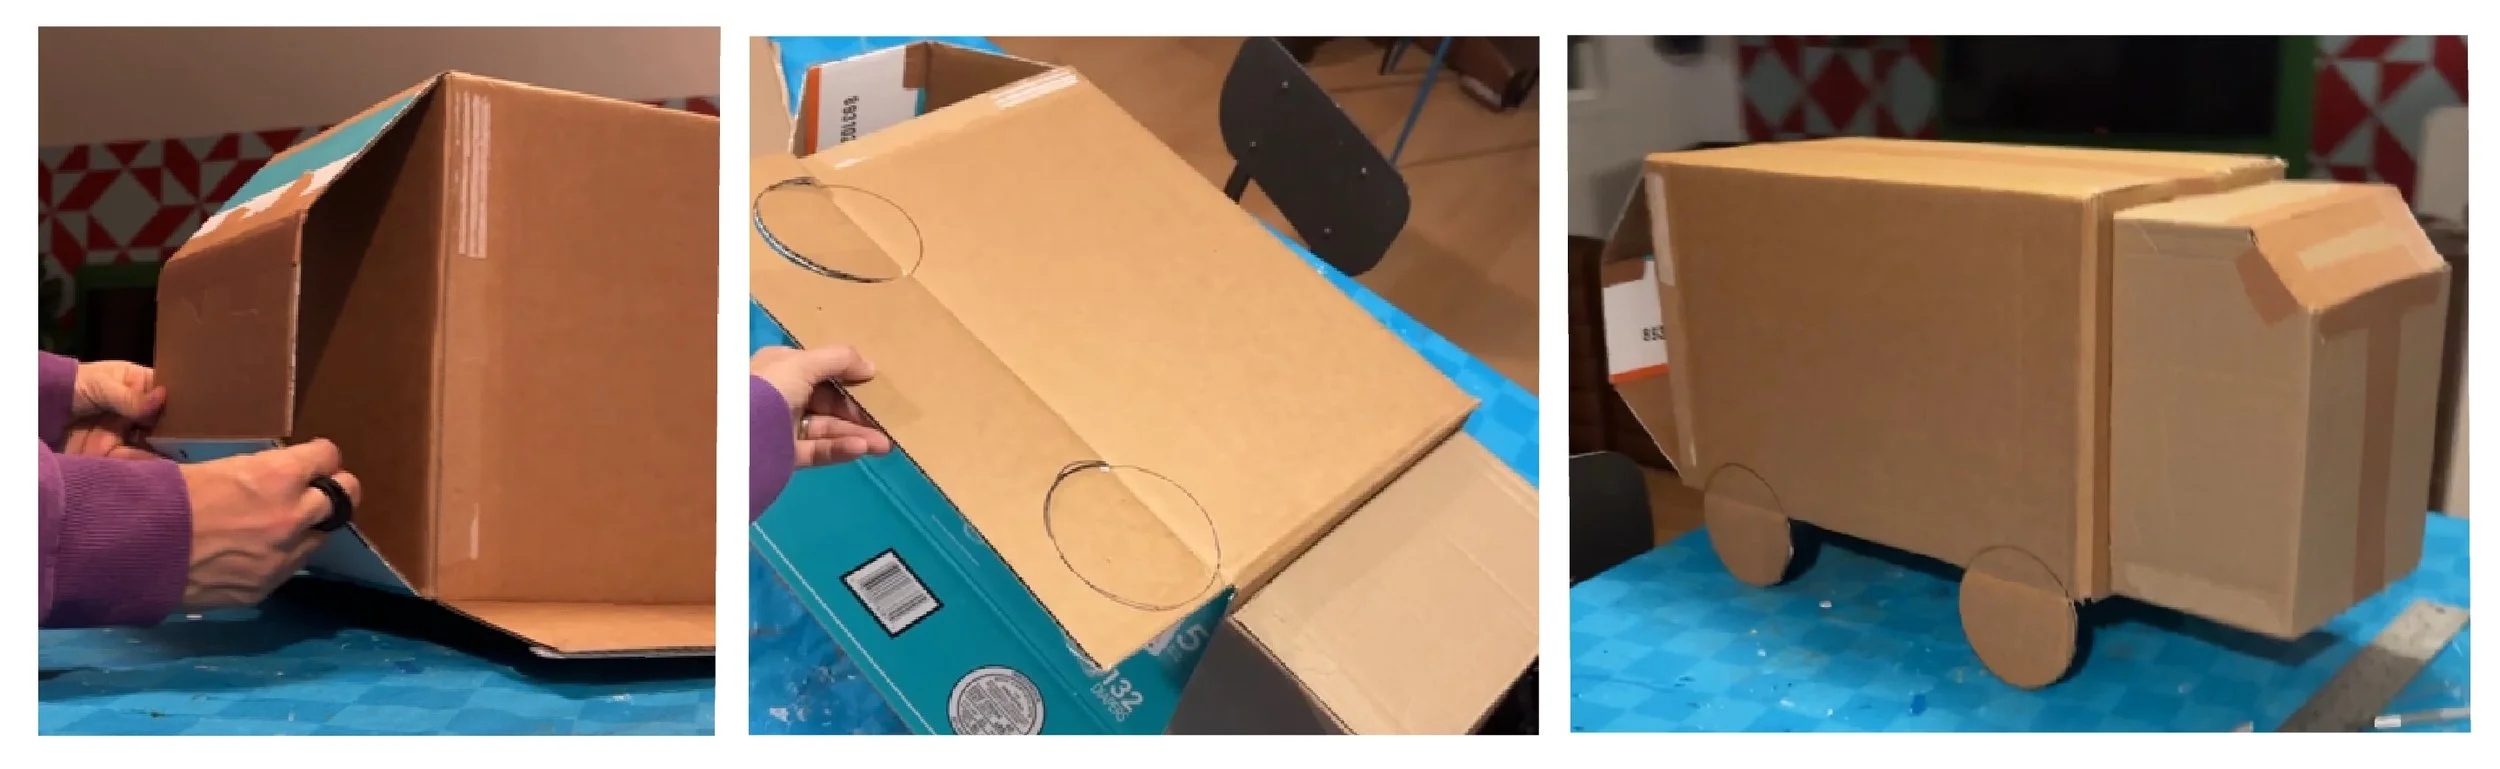
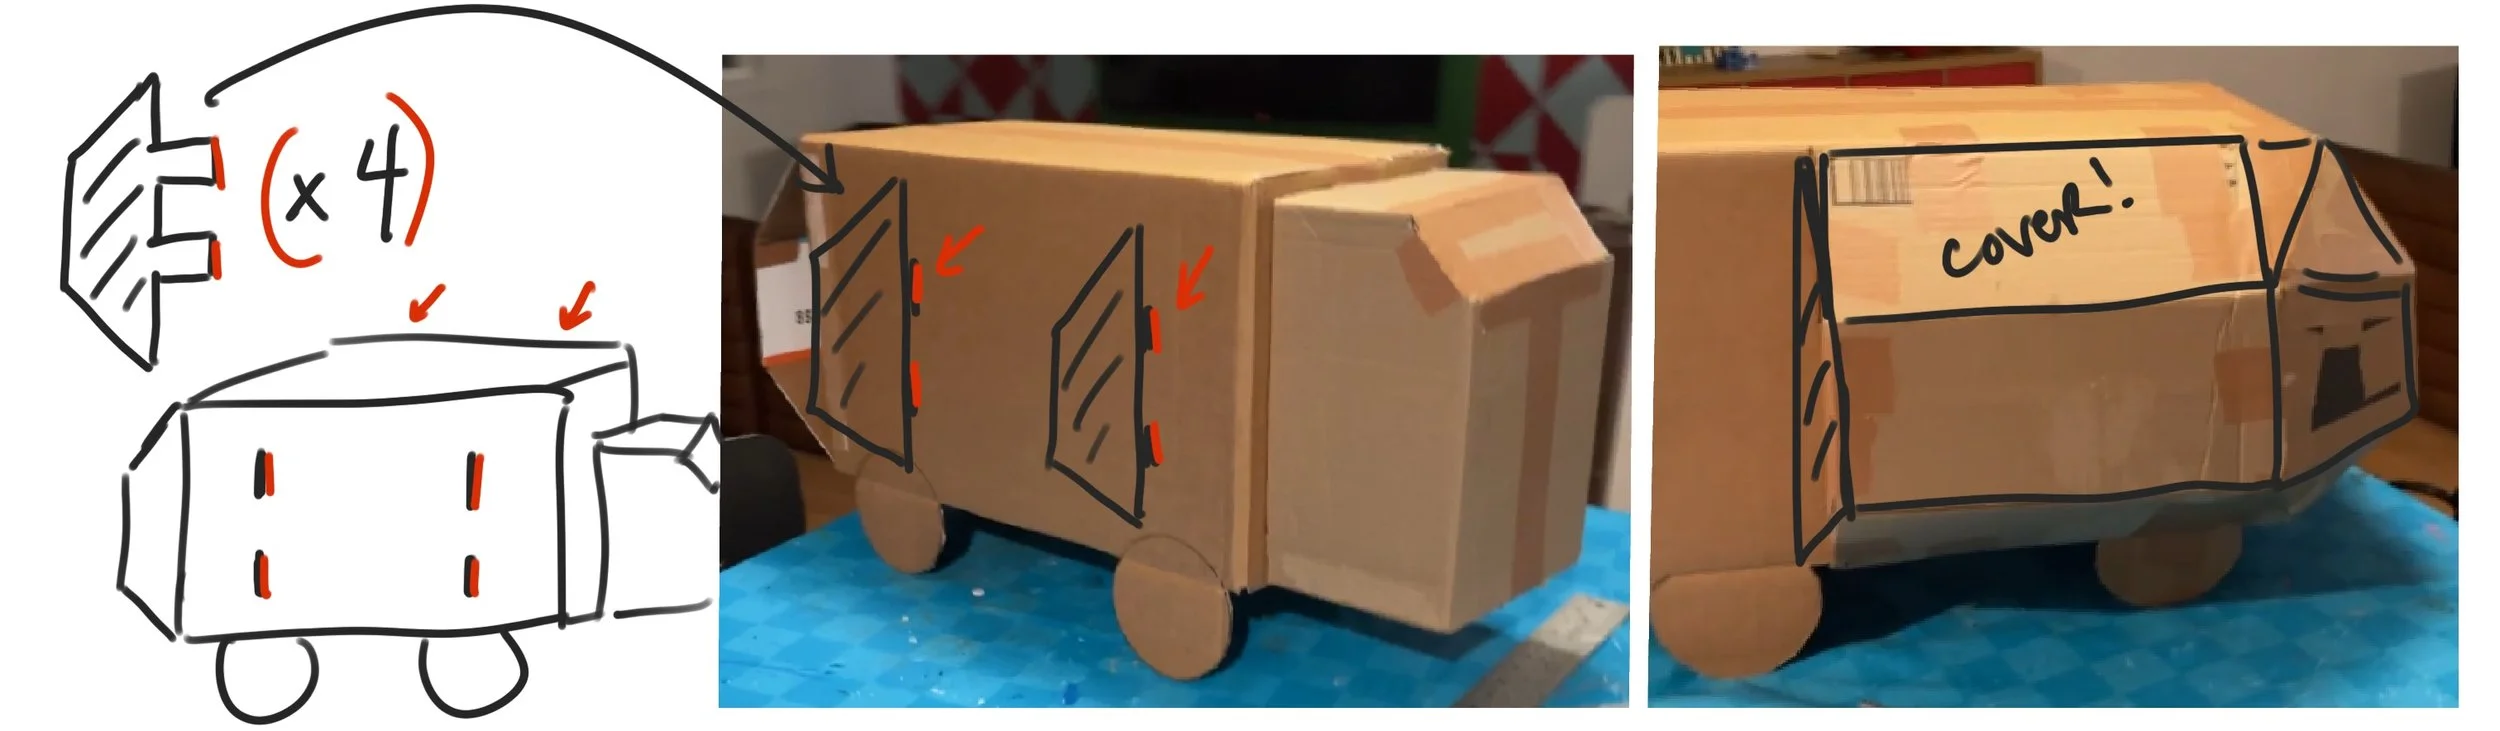
This side bump out step is optional. I cut a piece of cardboard that looks like a trapezoid (see below for this step as well) - and left 2 prongs on it to stick through main portion of truck. If you push those through and alternate which way you tape them on the inside of the truck - they are secure and stand up straight.
Then use filler pieces to cover and add dimention to the truck sides.
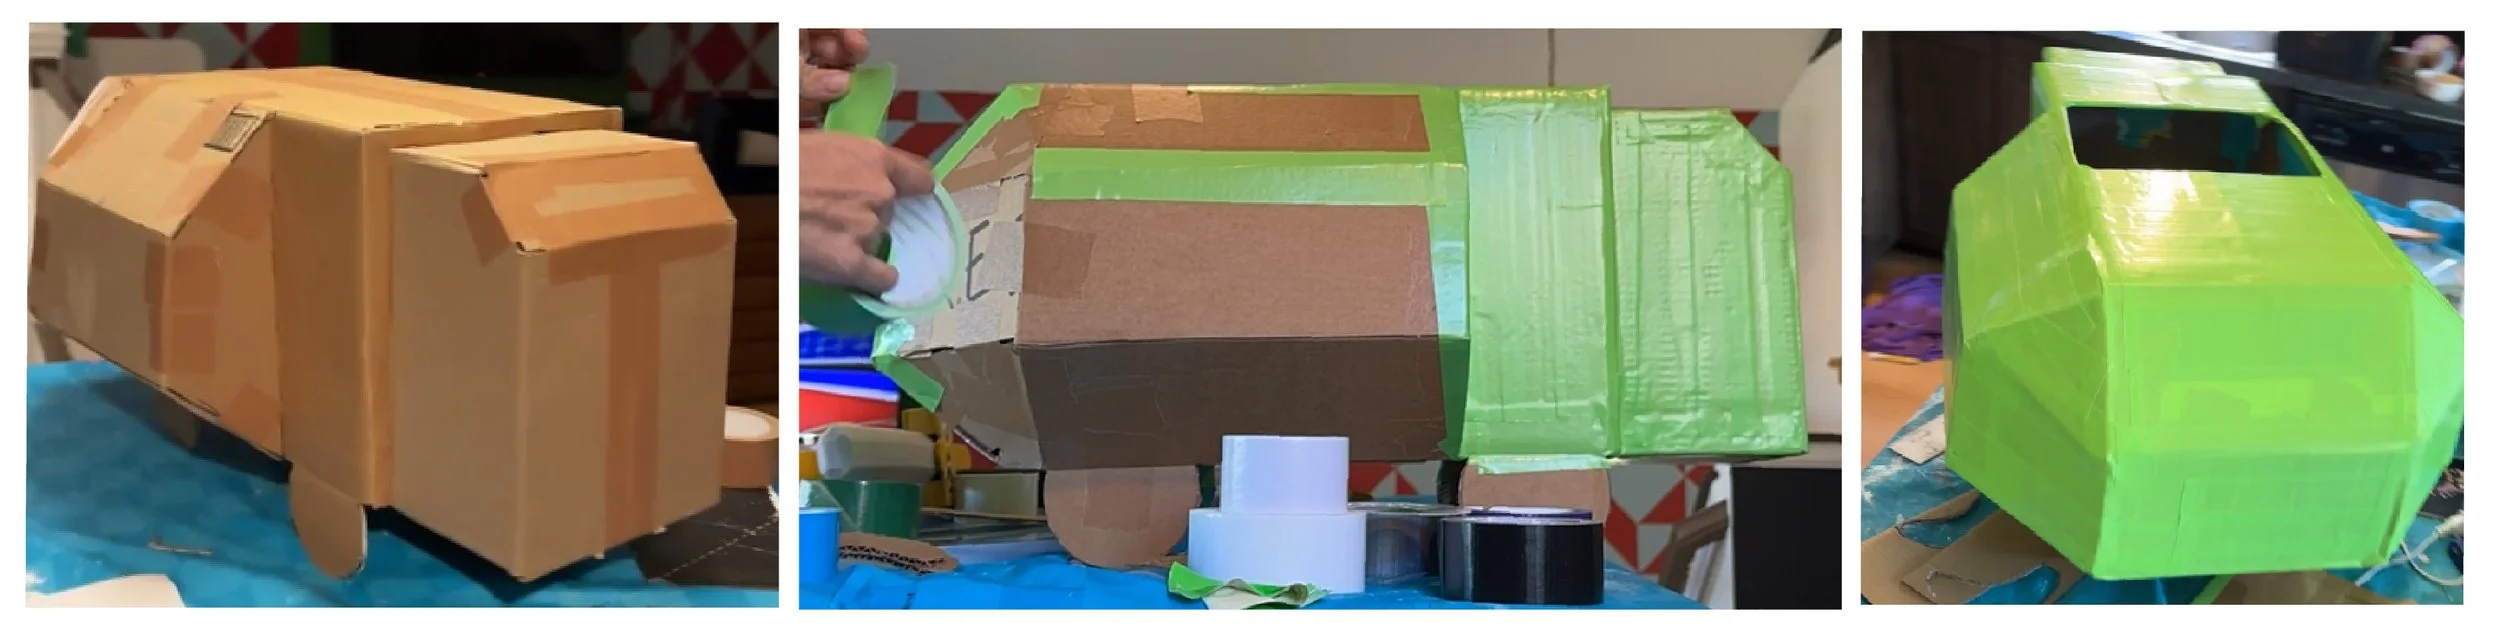
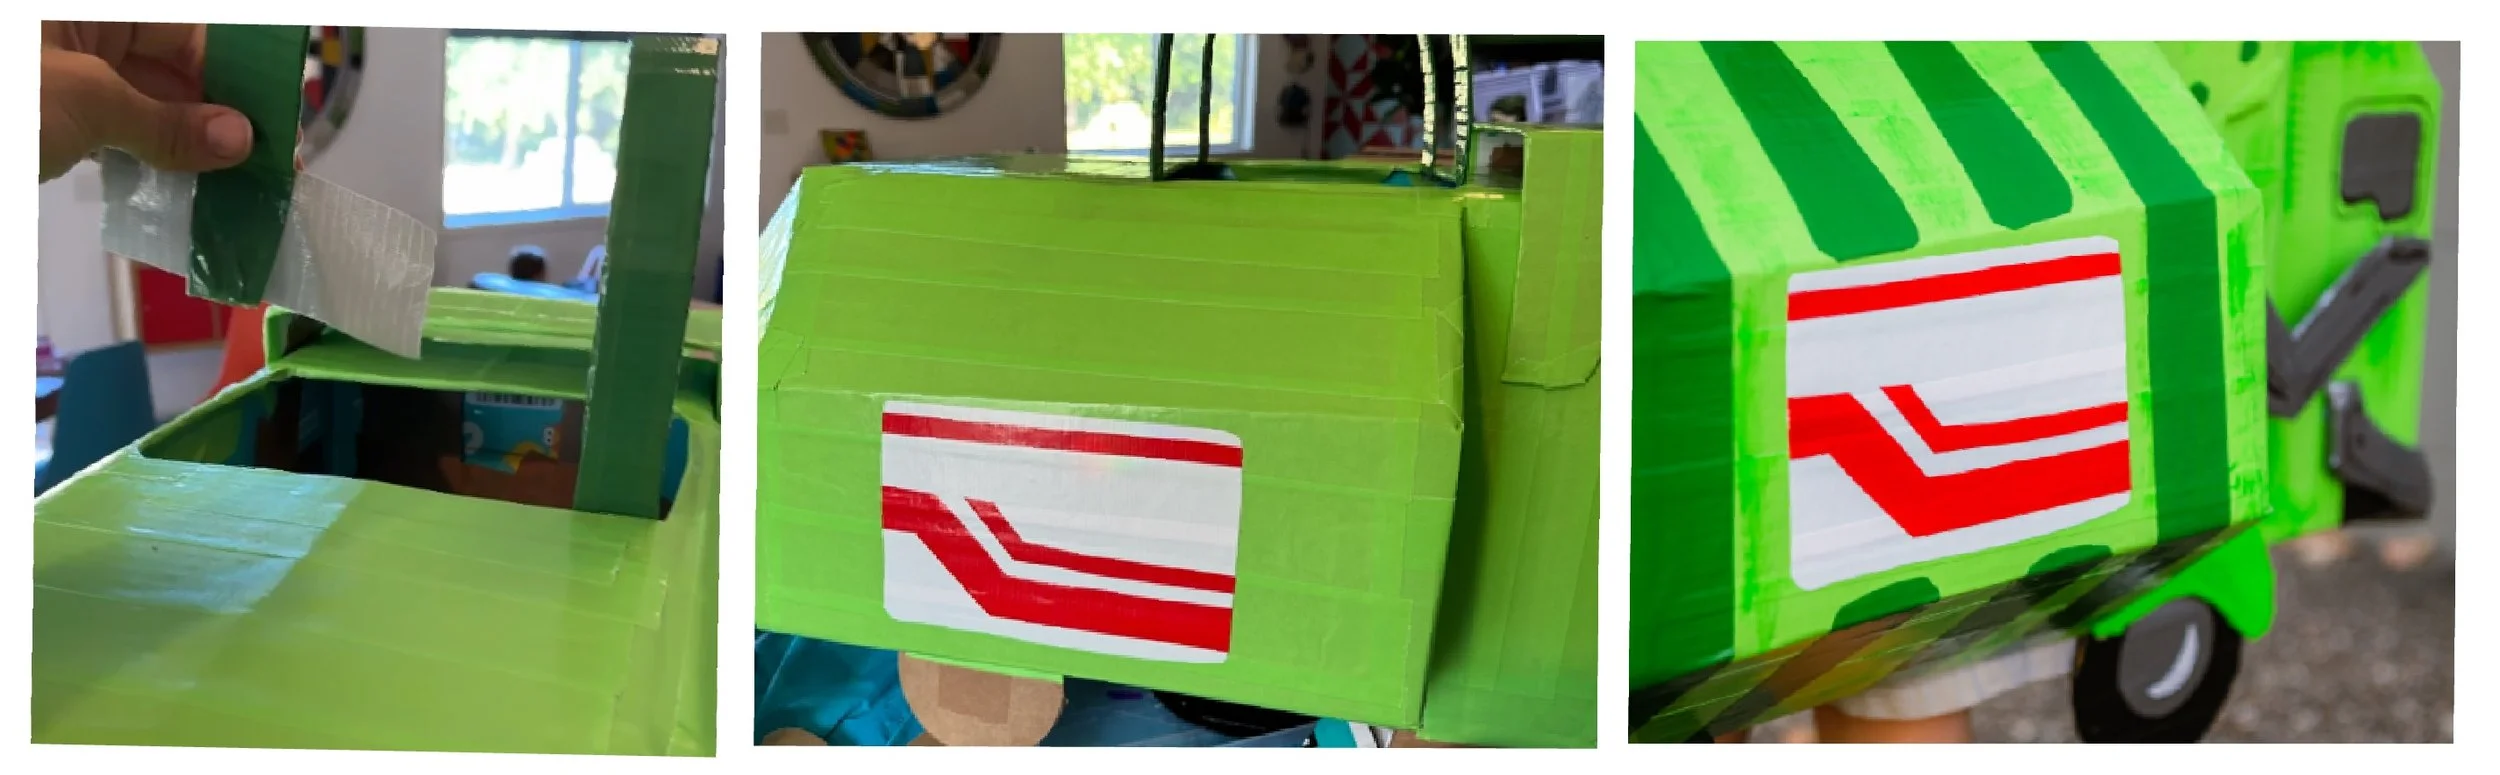
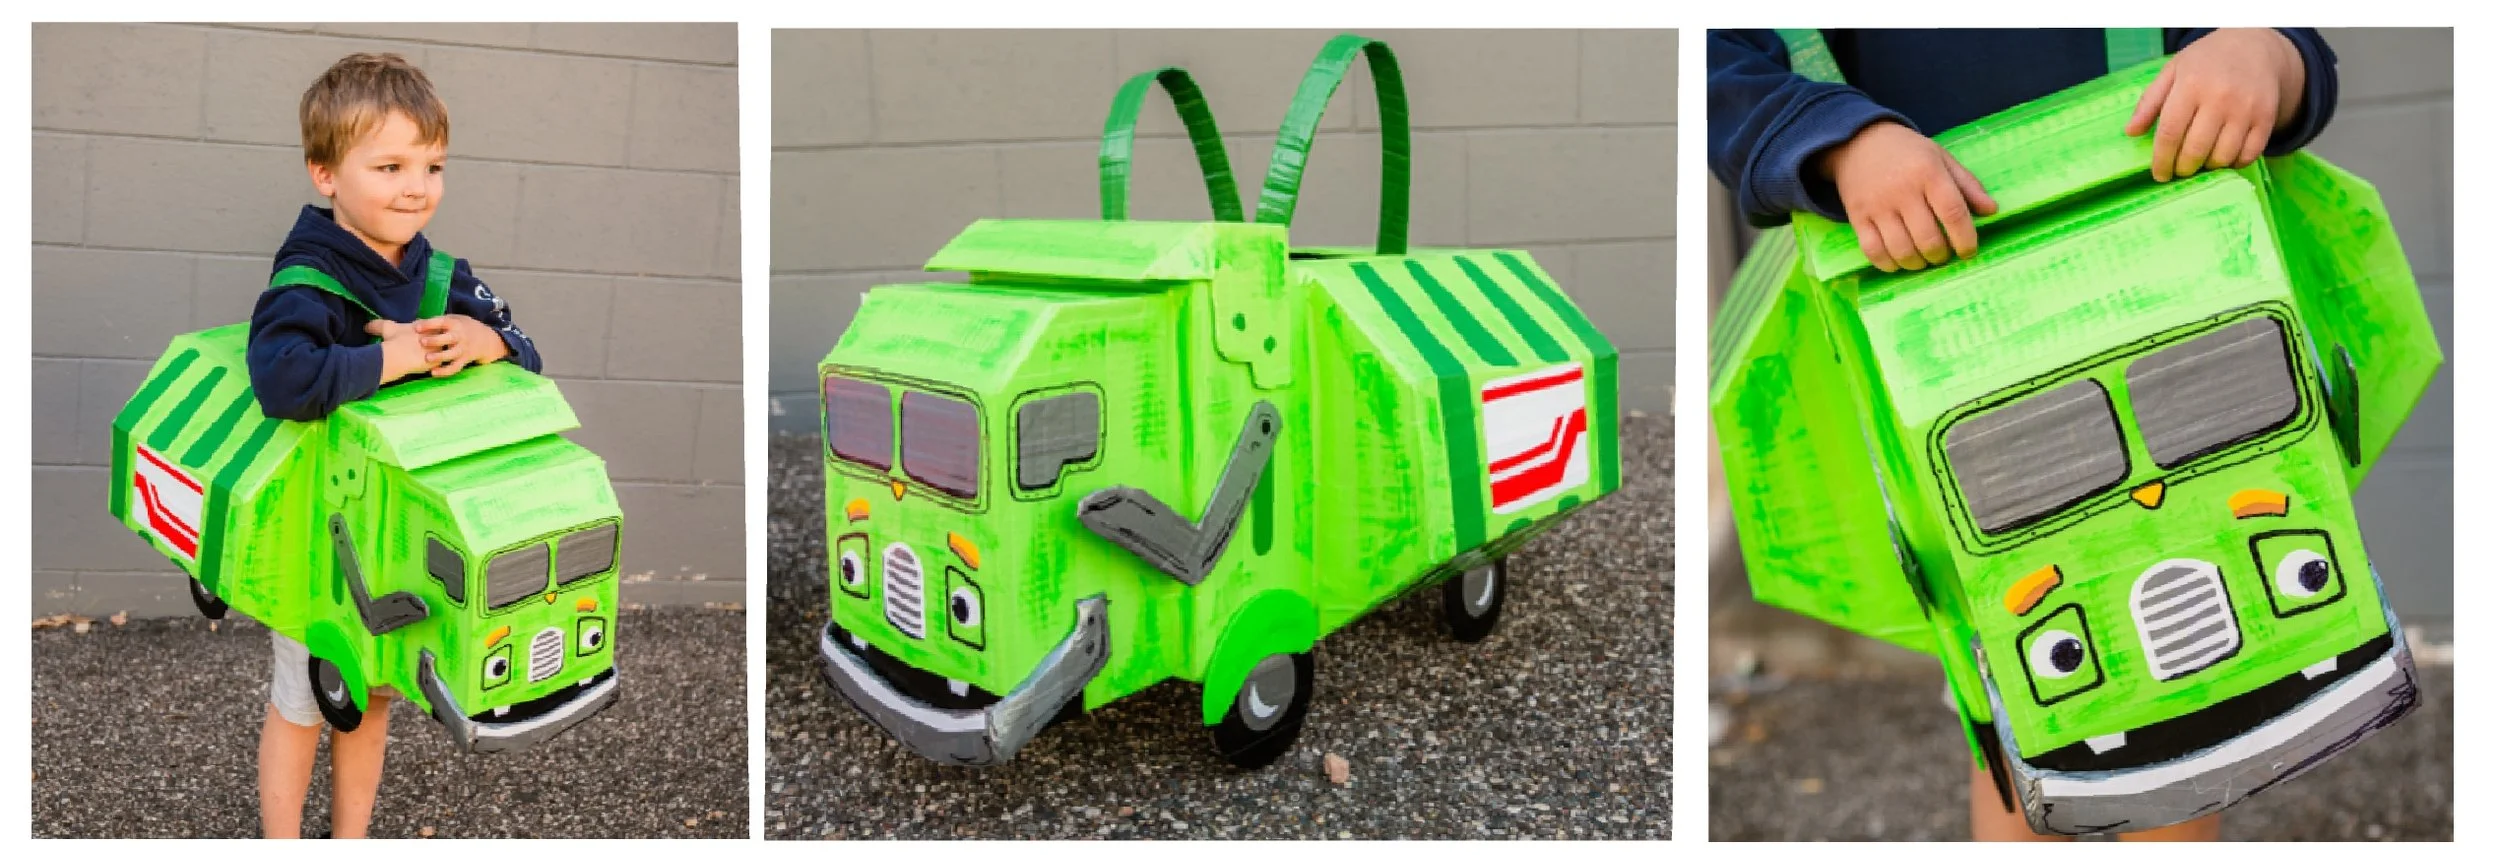
Cover the truck in duct tape. Adds color and a lot of durability / weather-proofing / fun!
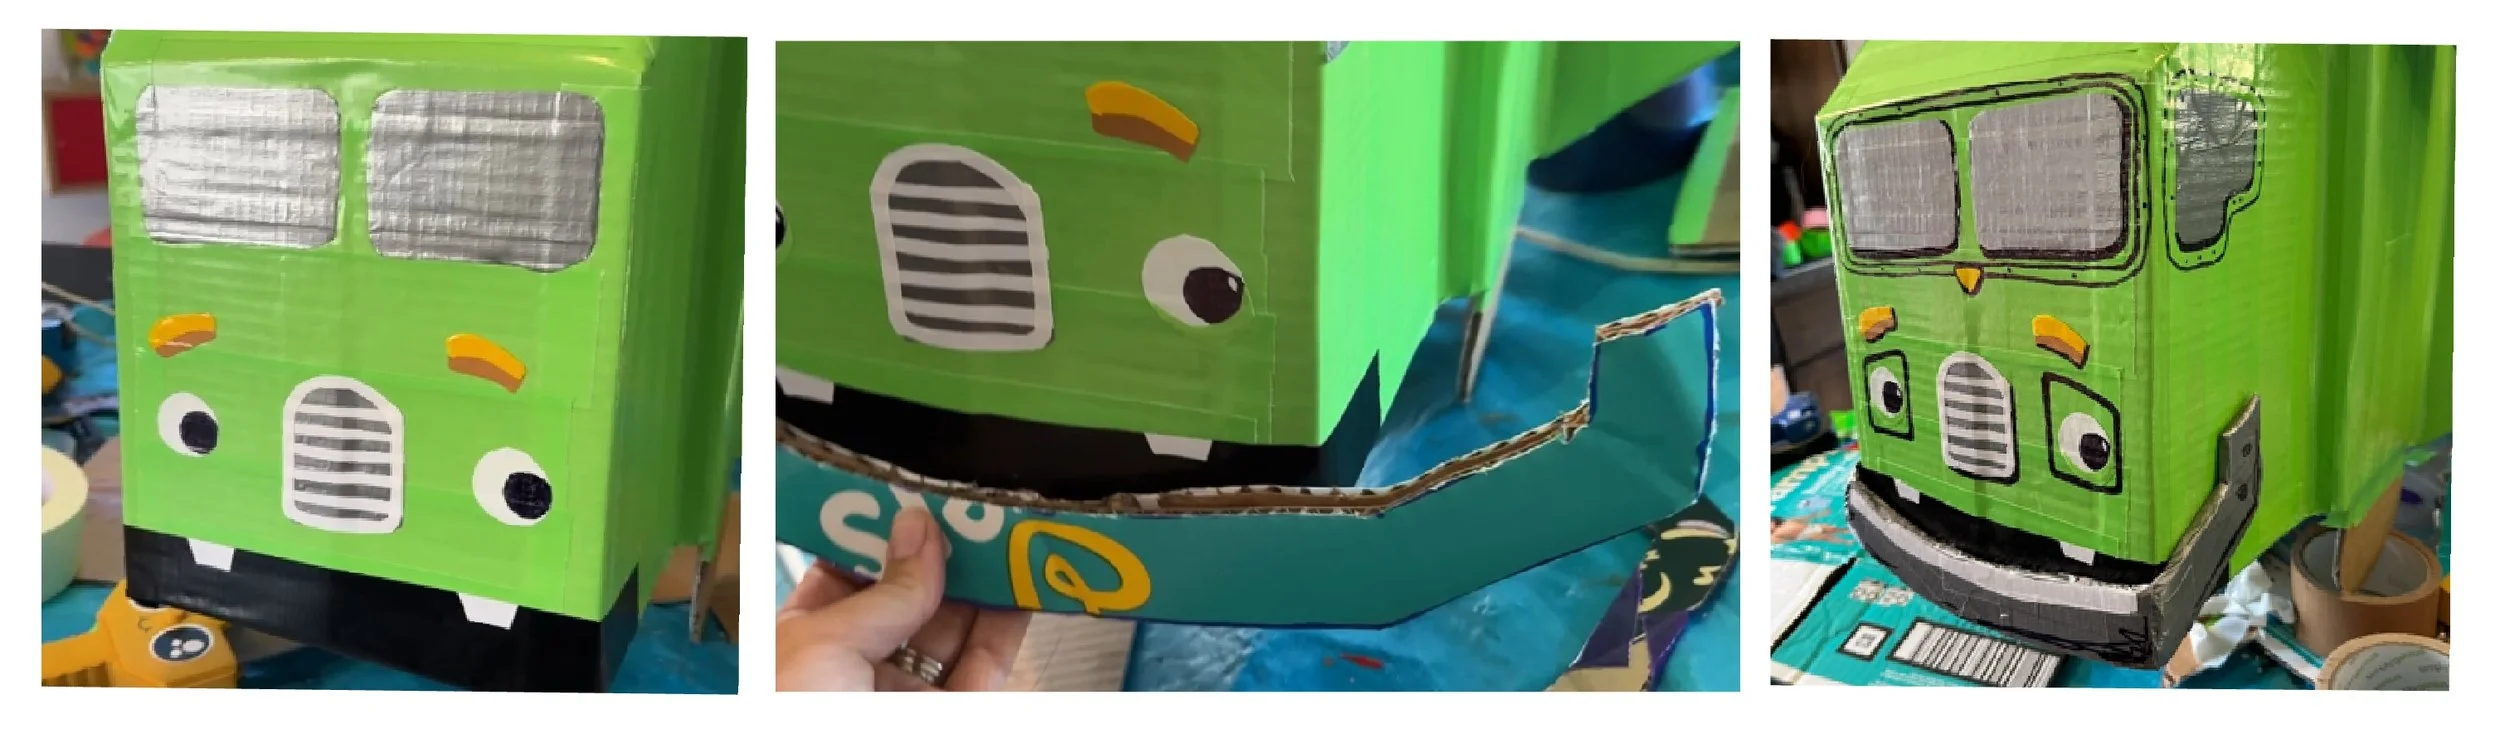
You can lay duct tape on - and use a Sharpie to draw the shape you’d like - then cut around it with an Exacto knife. Peel back the excess and you’ve made a duct tape sticker detail. I did this for the windows / eyes, eye brows, teeth.. etc.
As for the smile - I cut a smile that’s longer than the front of the truck - so it can fold over on each side. I hot glued this in to place. But duct tape can work to secure it too.
I then went back and outlined everything with a Sharpie to help it POP.
Straps are simply a 1.5” strip of cardboard cut as long as your little kiddo needs - then covered in tape and taped into place on the inside of the vehicle. More details and stickers can be added. Or paint works too!
The pieces for the visor are shaped and folded as above. And secured with hot glue or duct tape.
I also took a little darker shade of acrylic paint and “dry brushed” - just minimal paint to rub around to dirty it up. Works well for a garbage truck.
If you made it this far — AMAZInG!! This is a tough build! Congrats and hope your little one loves it! :)EM