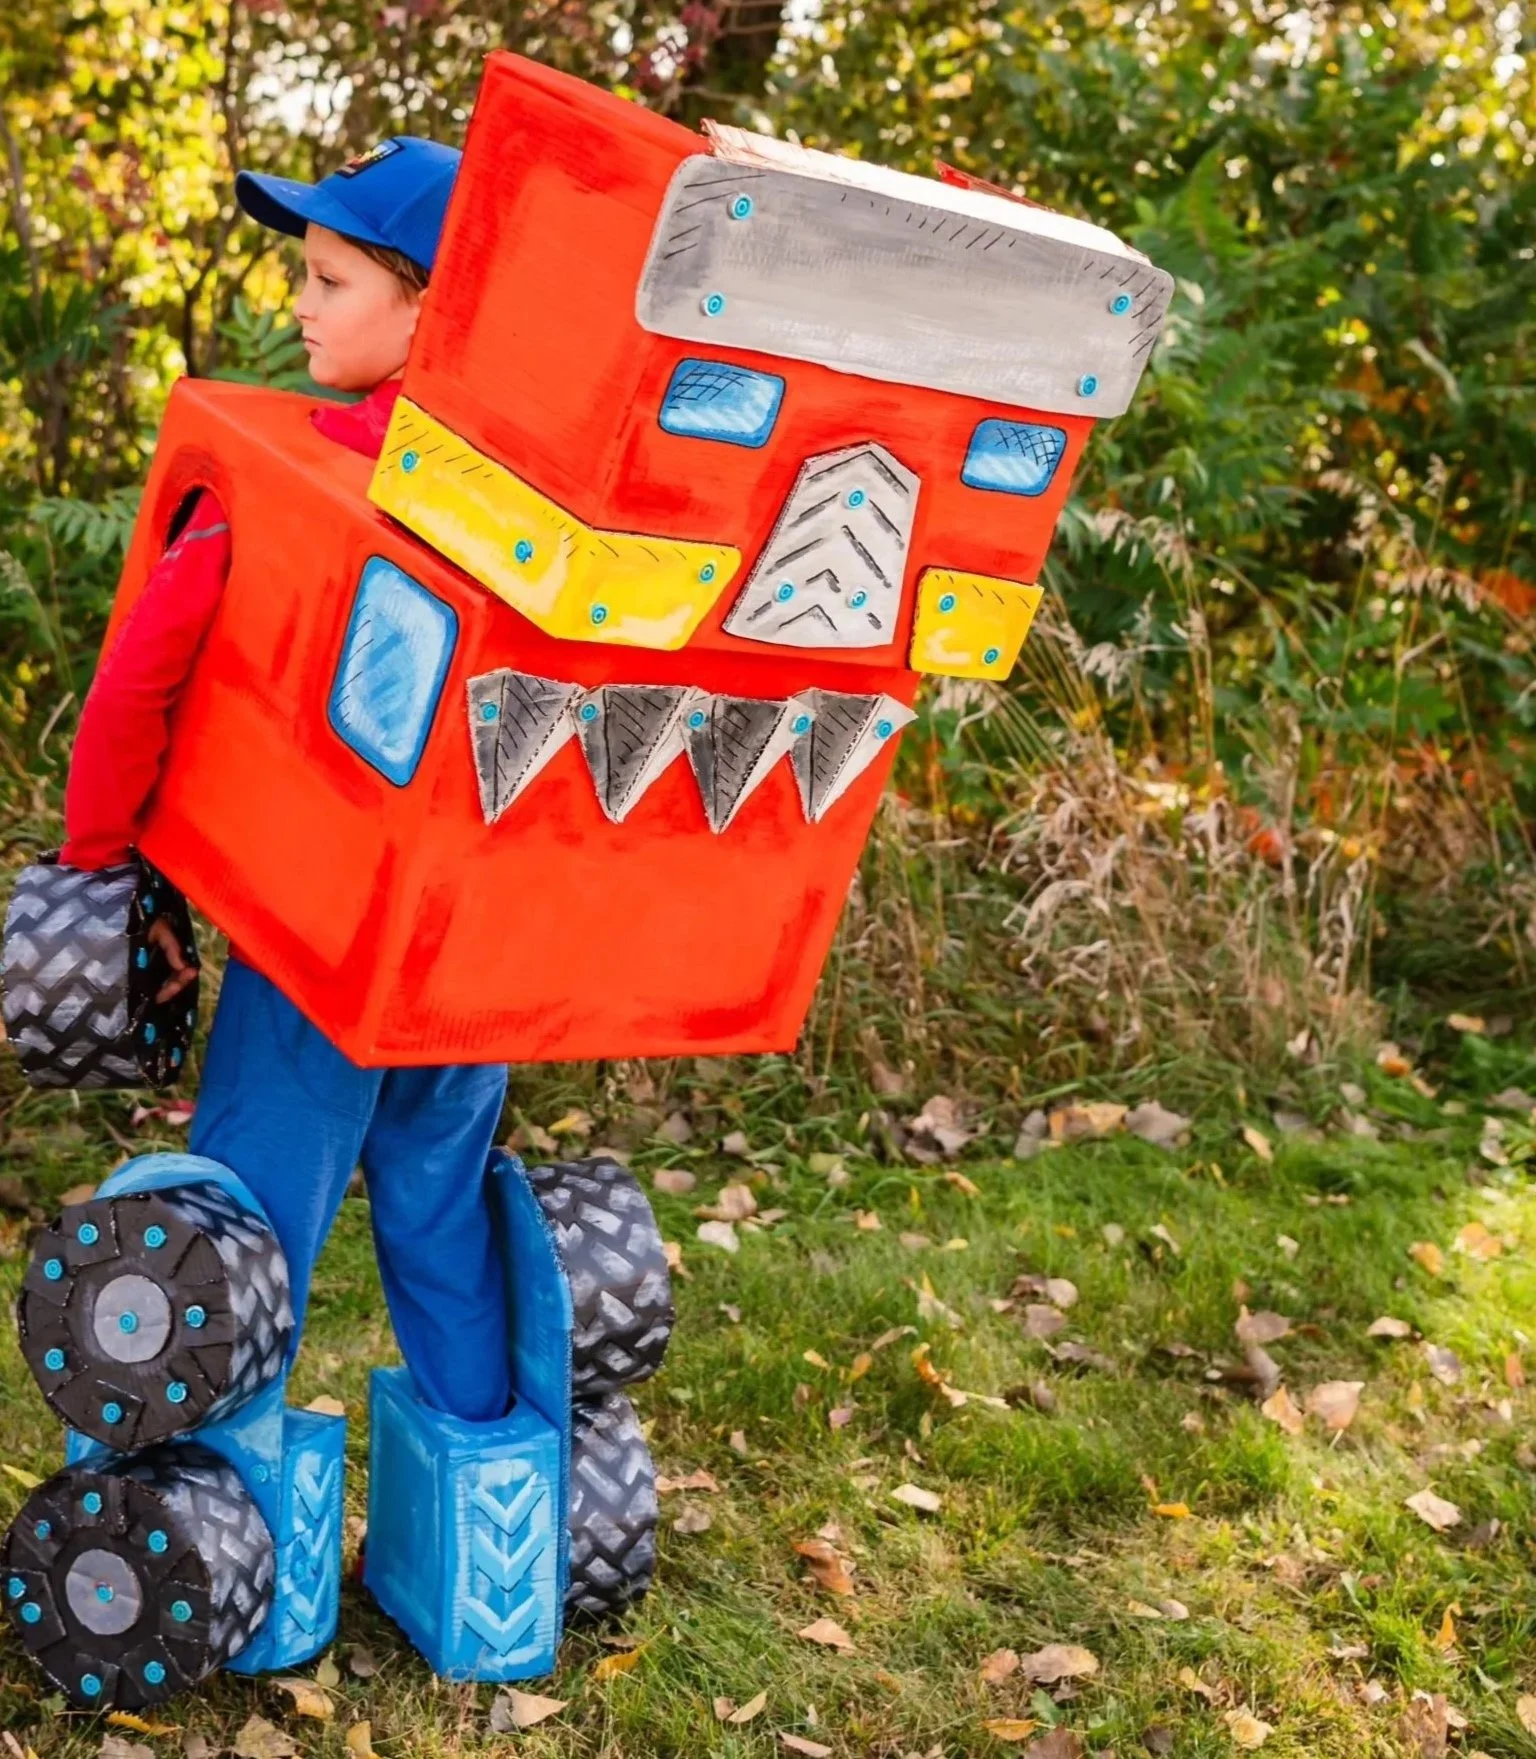
DIY Cardboard Transformer Costume
A few boxes
Packaging Tape or Makedo Scrus /Tools
Primer / Red, blue, black, white Acrylic paint
Sharpie Marker
Exacto Knife
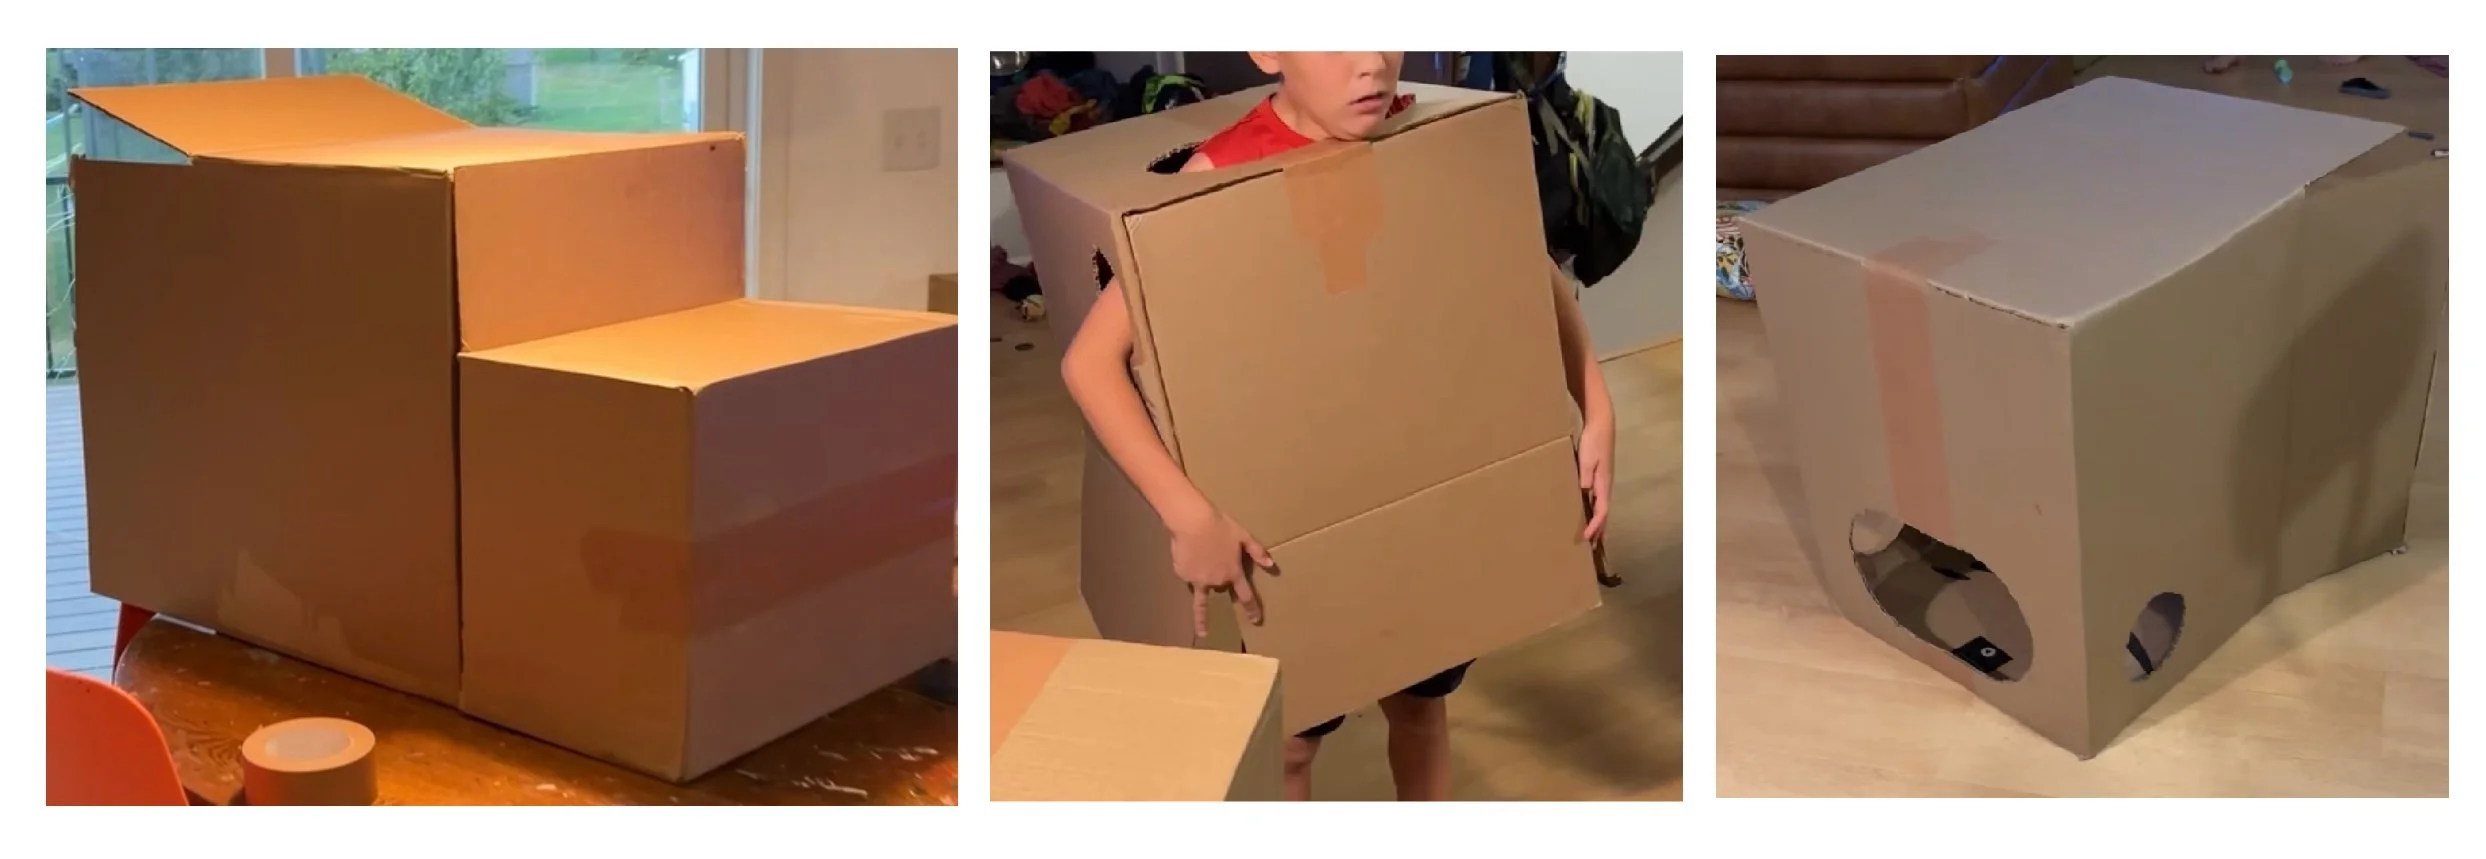
Find boxes apparox this proportion - and good size for you kiddo. In the larger box - cut arm holes and head hole by tracing bowls or plates, then cutting with an Exacto Knife. NOTE: holes should be towards front side of box - since they will need to lay down in the costume.

As for the “Bumper” or front box - cut all side flaps except top one. Next, with the flap you left on pointing upward, 2 sides of the box will be cut completely off. These are the sections that need to be removed to allow their head to poke through and so that they can see outward. See center image for this step. Far right image shows where their head would be in the costume.
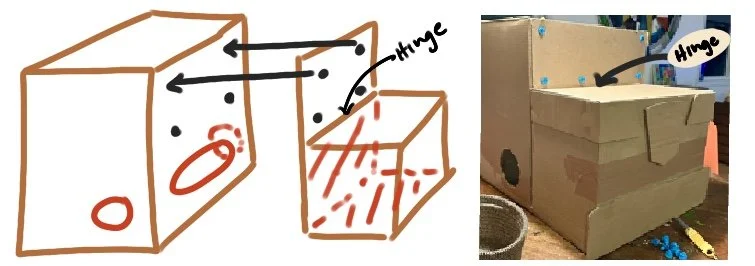
Attach bumper box to the bumper box with Makedo Scrus / tape / hot glue. Whatever works best for you! Make sure it’s secure - since this will be the hinge or the costume.
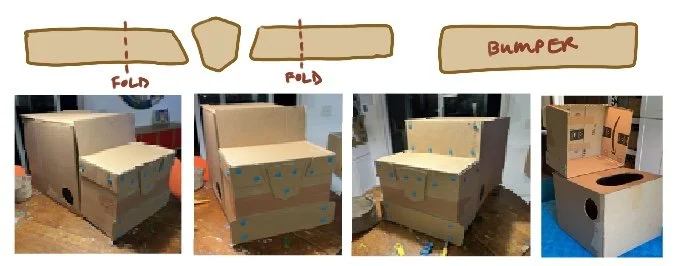
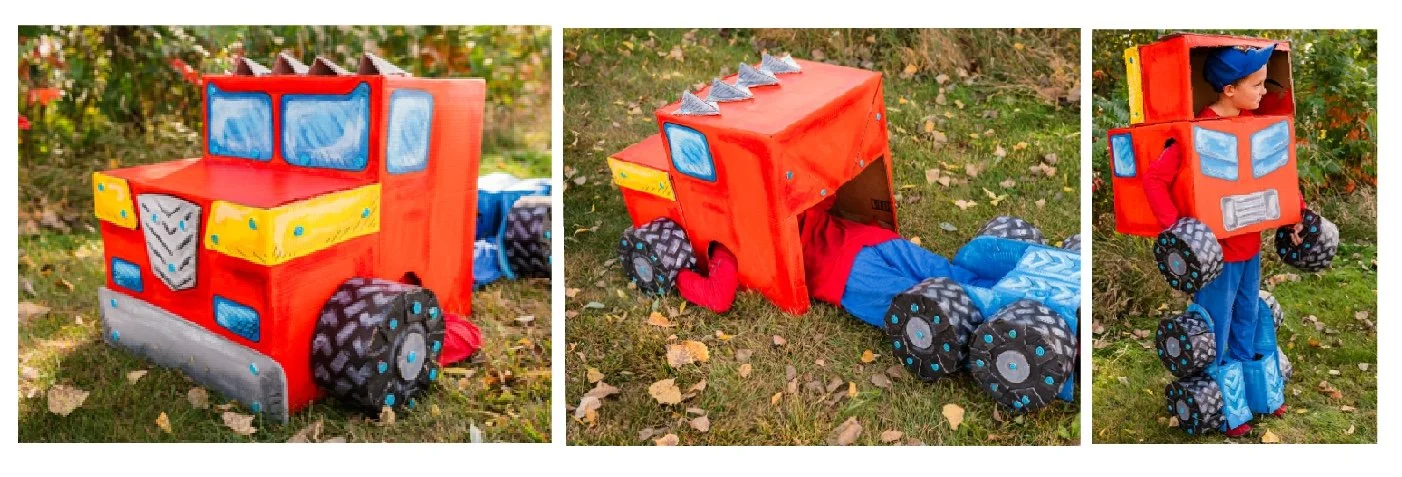
Add details to front of box. I cut out shapes as drawn. The bumper was simply attached to the bottom front of box. And the others were attached at the sides, then folded around to the front.
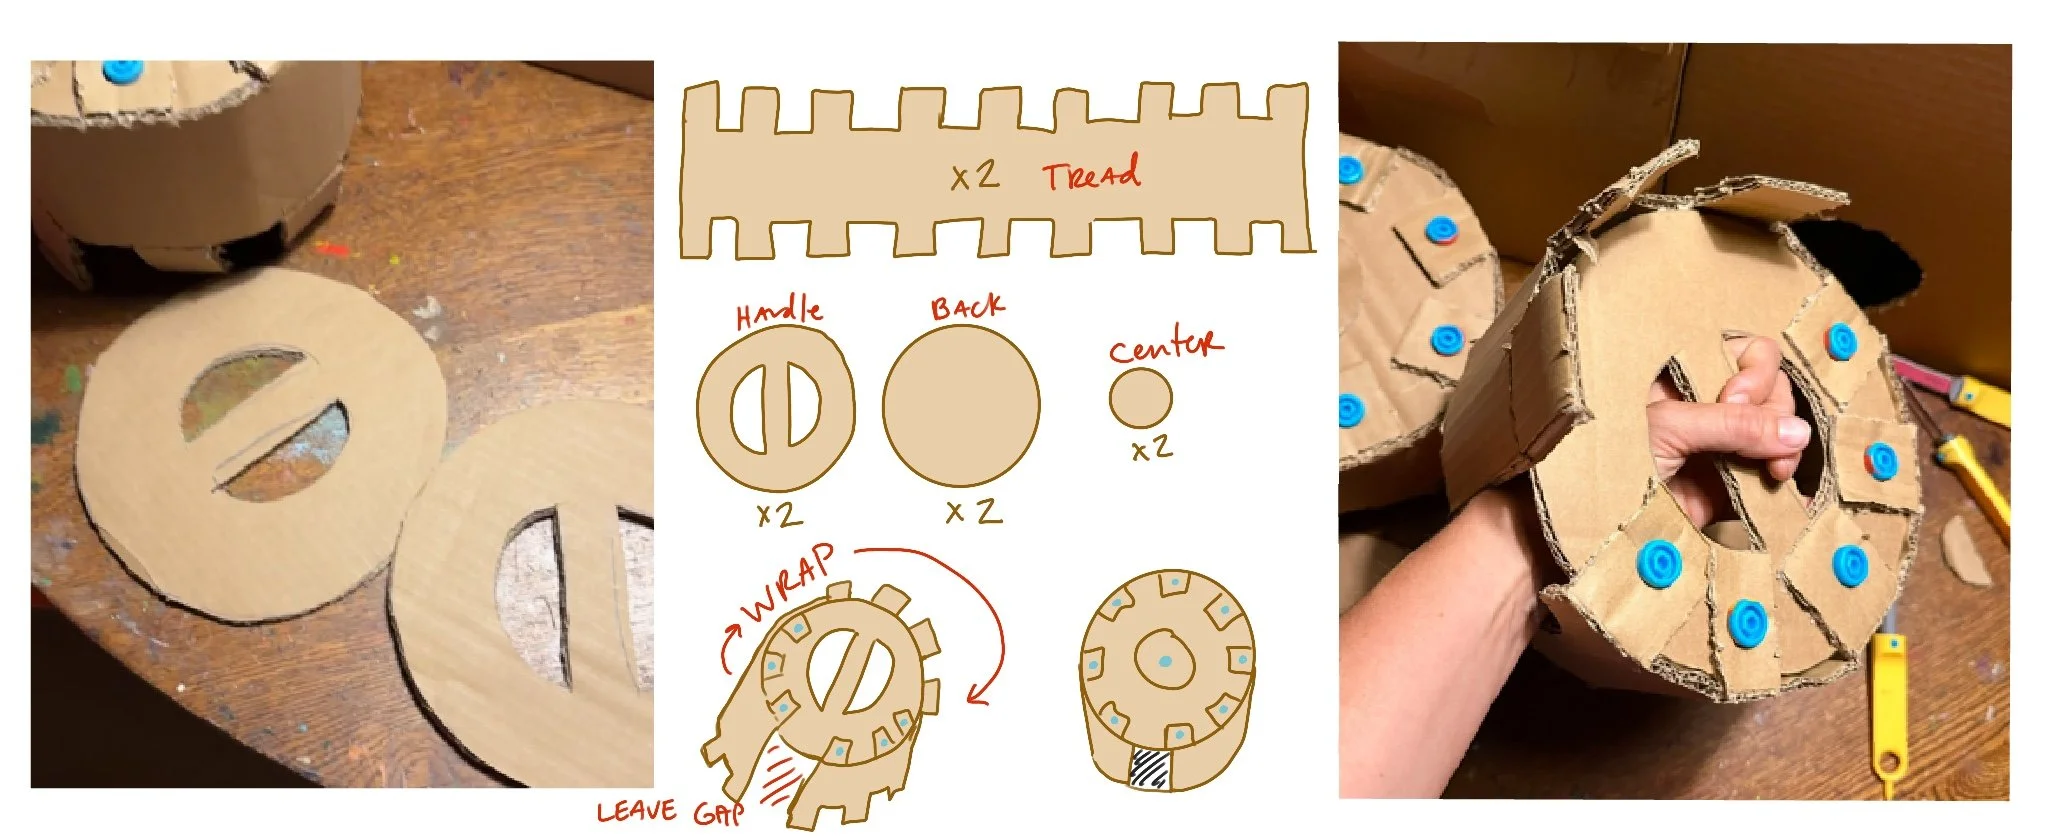
There is probably a more efficient way to make wheels. Just throwing that out there. I was trying to only use Makedo Scrus, since I was collaborating with the company. I love how they turned out - but if you have a faster way, or duct tape on hand - absolutely feel free!
Here I cut out 4 circles the size of the wheel I wanted. Approx 12” diameter. 2 wheels I left for the backs. 2 wheels I cut into to create the handle. I then cut a long rectangular piece of cardboard that will wrap almost entirely around the circles to create the treads of the wheels. I cut little square bump outs into this - to then fold over and secure to my circle. But again, a regular rectangle and duct tape could also work!
NOTE: make sure to leave a gap for them to stick their hand and wrist through! Approx 3” wide.
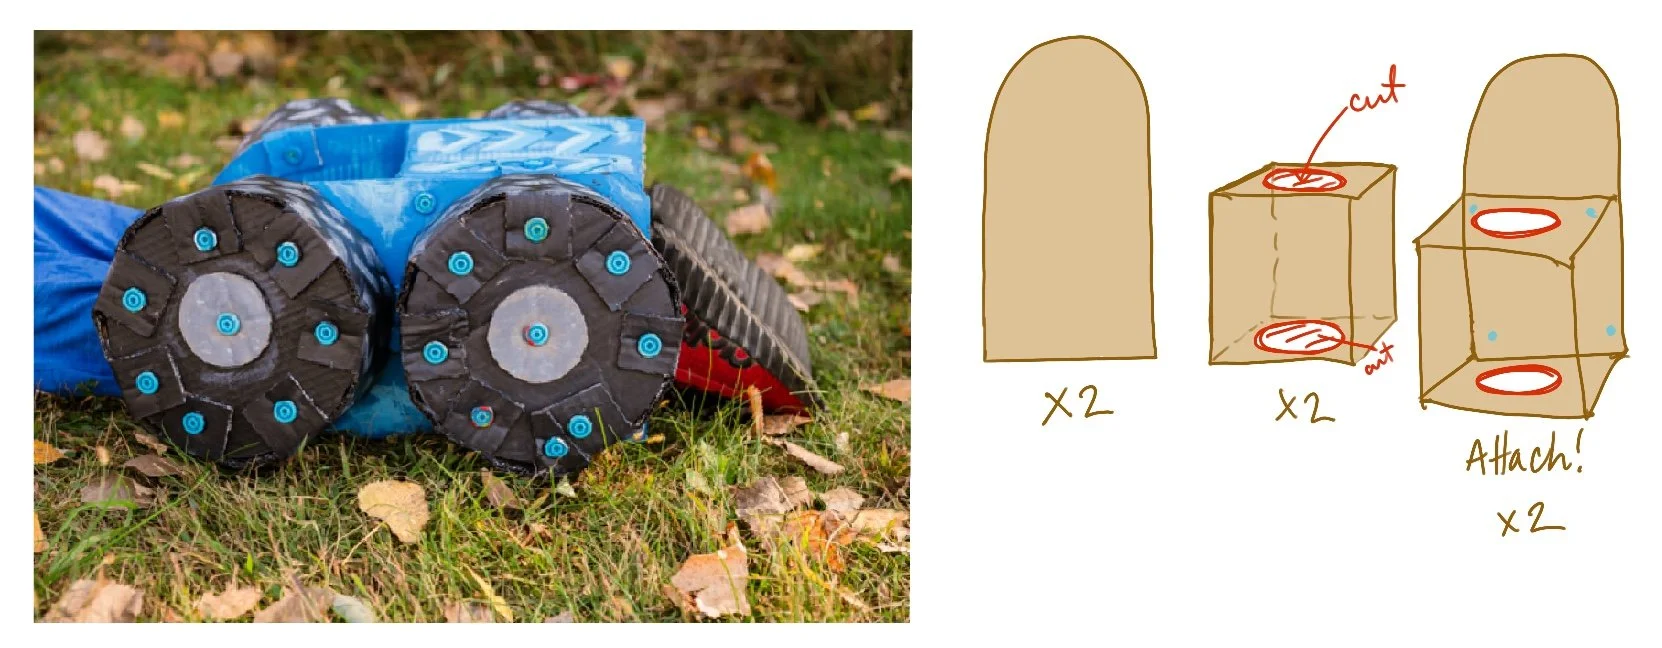
Cut rounded rectangle piece x2. This should be about as tall as your child’s knee. Find 2 small boxes approx half that height. Cut round hole for shin and foot to go through. Shoe can be put on AFTER the foot is through. So, hole doesn’t need to be big enough for shoe. Then attach the box and cut piece together.
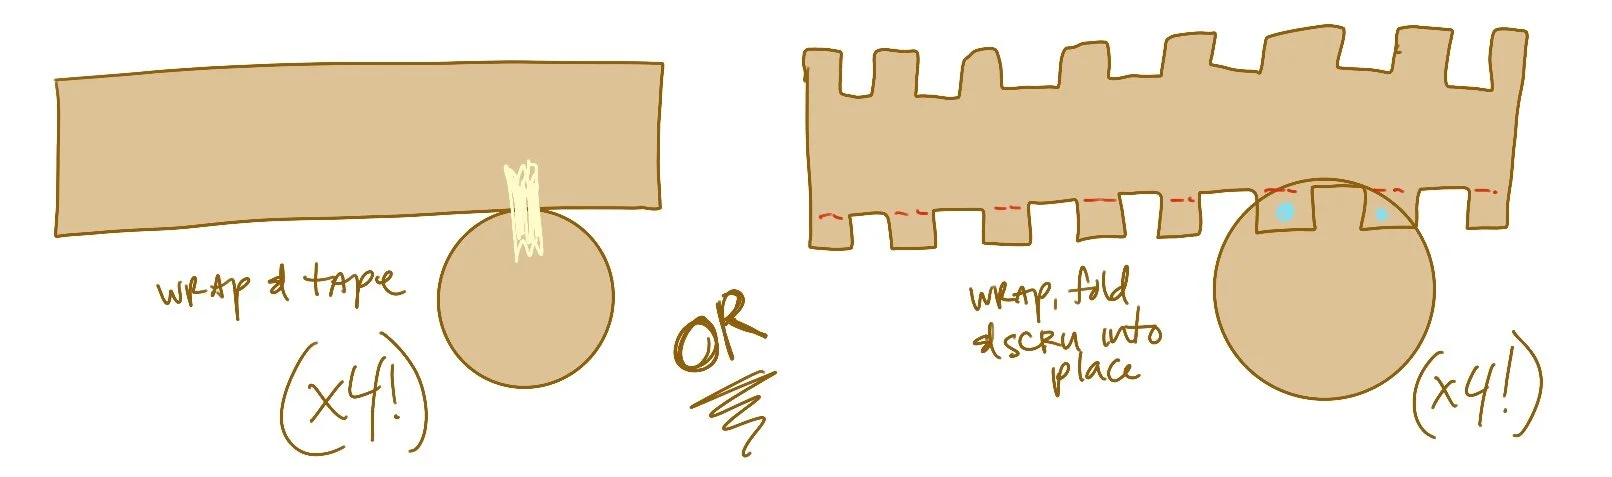
Make 4 more wheels - however you’ve now found that suites you best. :)

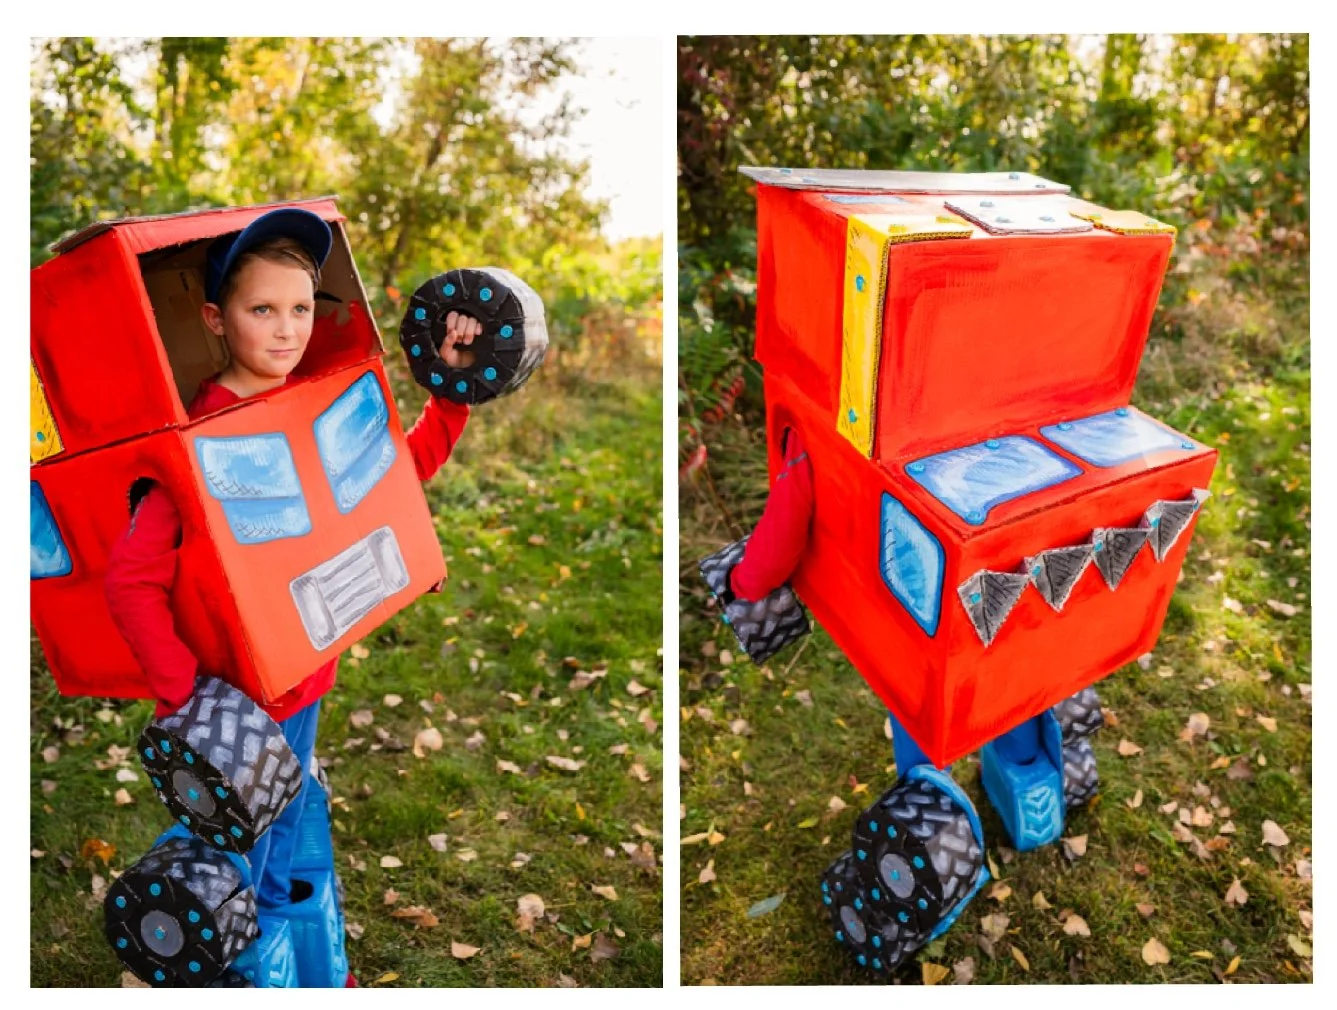
Attach 2 wheels on your right outside leg. Attaché 2 wheels stacked on the left leg. I did the attaching with Makedo Scrus. Duct tape or hot glue will work great too.
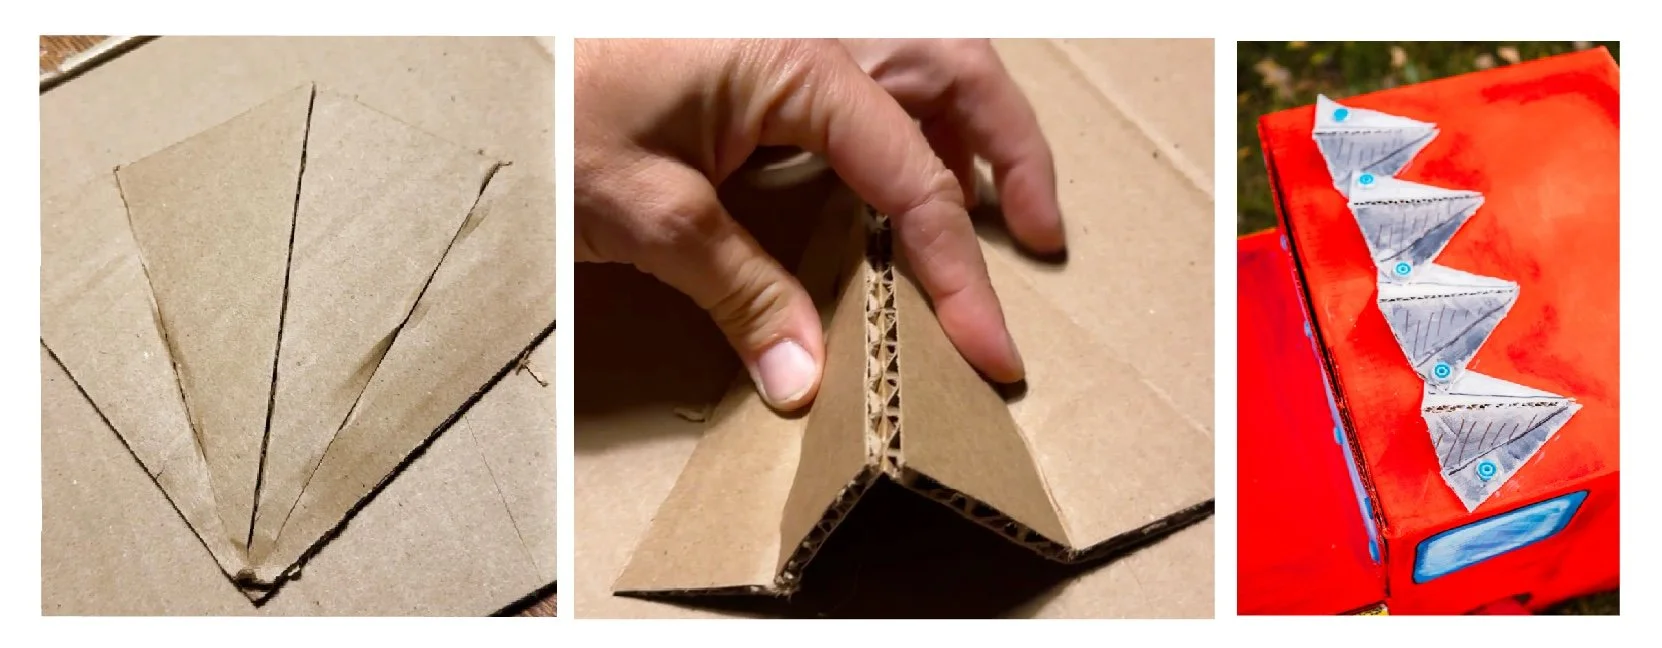
On top of the main section of the costume - I made these triangular pop ups. Just adds more color and “chrome” to the vehicle. Secure each side - while bumping the middle section up. I eventually shaded one side slightly darker with paint for a more 3d effect. We’ll get there. Good job!
Next up my kids and I primed the whole costume. I used “gesso” - and artist’s version of primer, since I had it on hand. But any water-based, interior primer will work well with acrylic paints. This is just to get the costume WHITE - so that the reds and yellows really are vibrant.
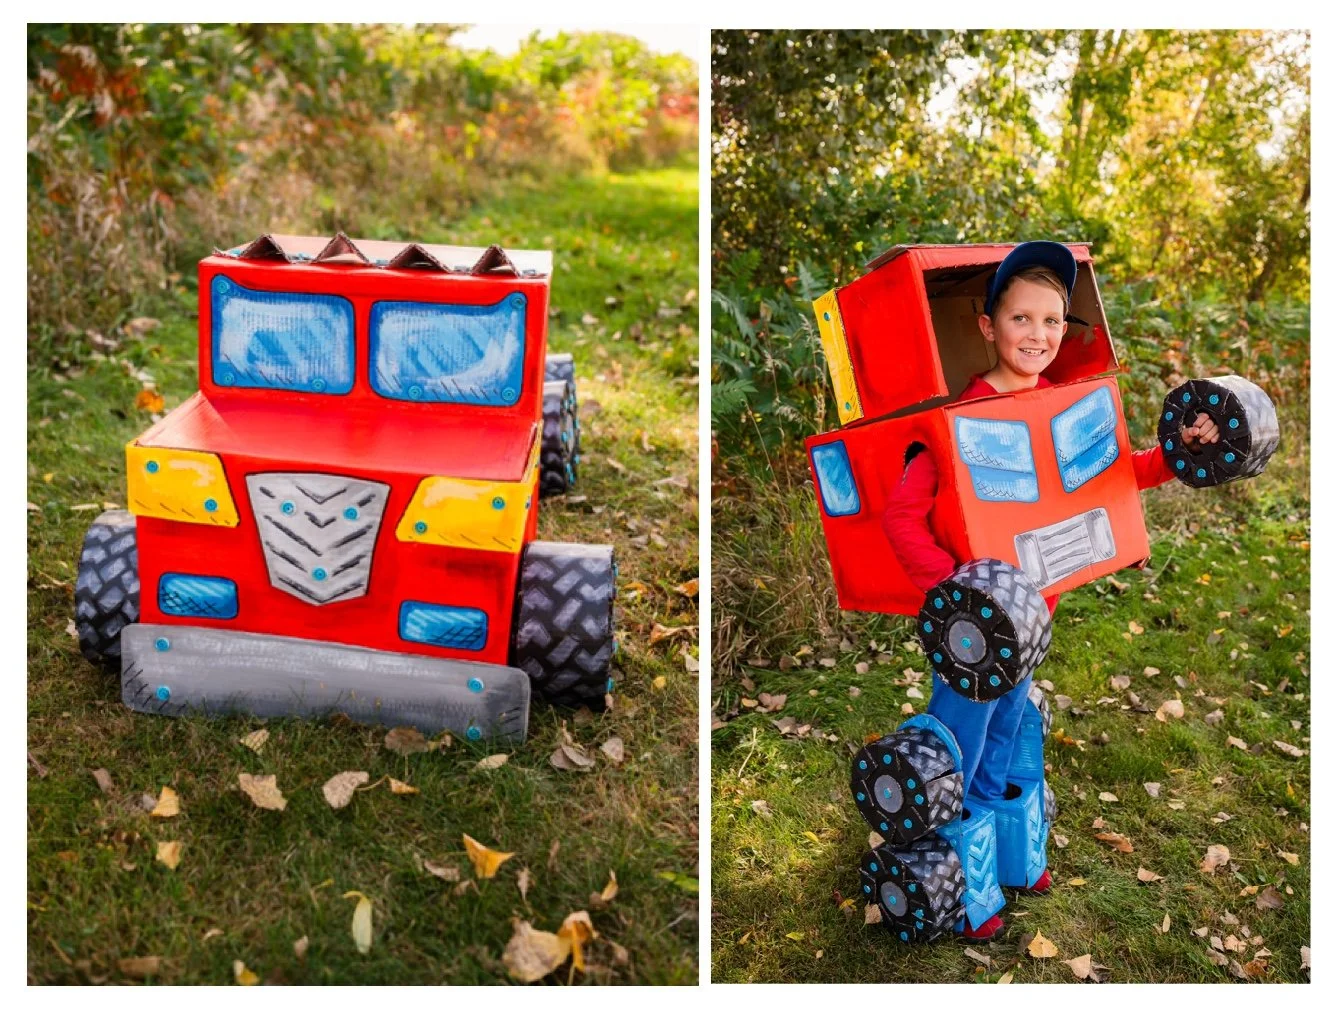
Paint! Things look a little more real / interesting if you use a darker and lighter version of that same color in each section. For example, look at the bumper. It’s darker on the bottom, lighter grey near top. So, adds dimension. I went back and added sharpie outlines to crisp everything up once it was dry, and WOO-HOO! You have an epic costume! Congrats!!!!